

What the Installation Timeline Actually Looks Like
Most people are surprised at how quickly a rainwater tank installation moves once the groundwork is sorted. The installation itself — getting the tank into position, connected, and running — is typically the fastest part. What takes time is everything that happens before and after: site assessment, council approval where required, plumbing connections, and first-flush diverter setup.
Timeline Breakdown by Tank Type
| Tank Type | Typical Installation Time | Key Variables |
|---|---|---|
| Slimline poly (above-ground) | 3–6 hours | Proximity to downpipe, pump requirement |
| Round poly (above-ground) | 4–8 hours | Site access, pump and plumbing connections |
| Underground poly or concrete | 1–2 days | Excavation, backfill, pump installation |
| Concrete block tank (in-situ) | 2–5 days | Construction time, curing, membrane application |
Step-by-Step: What Happens During a Standard Installation
Step 1: Site assessment
Before a tank arrives, a licensed technician assesses the installation location — slope and stability, distance from the house and downpipes, access for delivery, proximity to easements or boundary setbacks, and whether the connection point to internal plumbing is feasible. This step takes 30–60 minutes and may identify issues that change the tank position or require additional groundworks.
Step 2: Base preparation
An above-ground poly tank must sit on a solid, level base — typically a compacted gravel pad or concrete slab. If you don’t have a suitable surface, the installer will prepare one. This can add 4–8 hours to the job. An underground tank requires excavation to the correct depth and a compacted sand bedding layer.
Step 3: Tank placement and levelling
The tank is delivered and positioned. Large round tanks and all underground tanks require machinery. Levelling is critical — a tank that sits off-level puts differential stress on the wall and fittings, accelerating wear at the low-side connections.
Step 4: Plumbing connections
A licensed plumber connects the inlet (from your downpipe, via a first flush diverter), the overflow outlet, and any connections to your household plumbing or pump assembly. NSW law requires that any work connecting rainwater to internal household plumbing be carried out by a licensed plumber.
Step 5: Pump installation (if required)
Pump installation involves positioning the pump, connecting the suction line from the tank, installing a pressure vessel, connecting to the outlet plumbing, and commissioning the pressure switch to the correct cut-in and cut-out pressures.
Step 6: First flush diverter setup
The first flush diverter is installed in the downpipe between your roof gutter and the tank inlet. Diverter sizing is calculated based on roof catchment area. An undersized diverter on a large roof doesn’t do its job. Your installer should size and document the diverter capacity.
Step 7: Commission and handover
The system is filled partially and tested — flow rate, pump cut-in and cut-out, overflow path, and all connection points. A commissioning check confirms everything is working before the installer leaves.
Cost Breakdown: Labour vs. Materials vs. Plumbing
| Cost Component | Typical Range (NSW) |
|---|---|
| Tank supply (slimline poly, 3,000–5,000L) | $800–$1,800 |
| Tank supply (round poly, 10,000–22,500L) | $1,200–$3,500 |
| Base preparation (concrete pad, if needed) | $400–$1,200 |
| Installation labour (above-ground) | $500–$1,200 |
| Pump and pressure vessel | $600–$1,800 |
| First flush diverter | $80–$250 |
| Licensed plumbing connections | $400–$1,500 |
5 Questions to Ask Your Installer Before Booking
- Are you a licensed contractor and is your plumber licensed under the NSW Home Building Act?
- Does the quote include base preparation, or is that separate?
- What is the diverter sizing calculation for my catchment area?
- Will the pump be sized for my actual household usage, not just a standard residential unit?
- Are council requirements for my address included in your scoping, or do I need to manage that separately?
Frequently Asked Questions
How long does rainwater tank installation take in NSW?
It depends on tank type. A slimline poly tank takes 3–6 hours. A round poly above-ground tank takes 4–8 hours. Underground poly or concrete takes 1–2 days. An in-situ concrete block tank takes 2–5 days. These are installation-only timeframes and don’t include council approval processing time.
Do I need council approval to install a rainwater tank in NSW?
In most NSW councils, a standard above-ground poly rainwater tank is exempt development under the State Environmental Planning Policy (Exempt and Complying Development Codes) 2008, subject to standard setback and height conditions. Underground tanks are more complex — some LGAs require a DA or Complying Development Certificate. Check with your council or ask your installer to clarify before committing to underground installation.
Does every rainwater tank need a pump?
Not always. Gravity-fed tanks positioned above the point of use can run without a pump. Most residential tanks, however, require a pressure pump to deliver usable flow to toilets, laundry, and taps.
What plumbing work requires a licensed plumber for tank installation?
In NSW, connecting any rainwater inlet or outlet fitting to your home’s plumbing system, installing or connecting a pump to household supply plumbing, and any connection to cold water supply in the home (dual-supply switches) all require a licensed plumber under the Home Building Act and the Plumbing Code of Australia.
How is the first flush diverter sized for my property?
Diverter sizing is calculated based on roof catchment area. An undersized diverter on a large roof doesn’t do its job of capturing the initial, most contaminated flow. Your installer should size and document the diverter capacity as part of the installation.

Related Articles
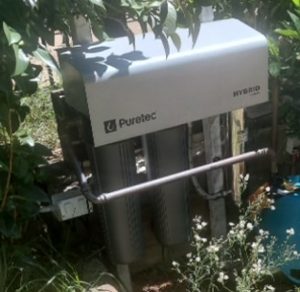
What Happens to Water Quality After a Tank Clean? How to Get Your Water Back to Safe Drinking Standard
Your water isn't immediately safe after a tank clean. Follow this flush, disinfect and test...
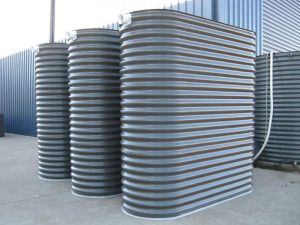
Underground vs. Above-Ground Rainwater Tank: Which Is Right for Your NSW Property?
Underground or above-ground rainwater tank? Full cost, maintenance, council approval and suitability comparison for NSW...
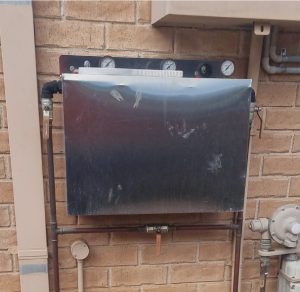
When Should You Service Your Rainwater Tank Filtration System? Signs, Intervals, and What Gets Checked
Rainwater tank filtration systems need servicing every 6–12 months. Learn the signs it's overdue, what...
